With the immense preparation and care you take in selecting the perfect dress, hair, shoes, flowers, and accessories, sometimes your make-up takes a backseat. However, what is on your face should certainly be a priority on your big day! Really take the time to decide what works for you and what doesn’t. Here are some really helpful tips that will help you avoid a wedding makeup catastrophe.
If you’re having your makeup “professionally done”:
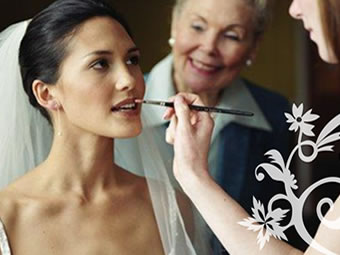
1. Take the time to go through magazines and tear out pages that illustrate makeup styles that you really like, as well as the ones you really hate. This will save you time trying to describe (endlessly) what you want or don’t want, and will really help the makeup artist visualize what she needs to do. Remember…your idea of pink lipstick and her idea of pink lipstick might be totally different; which is why a picture is really helpful.
2. Schedule a consultation with your makeup artist, or schedule a full makeup application well in advance. This will help you decide whether or not you like their style, and it will give you a good idea of how long it stays on, how it feels, etc.
3. Bring a picture of your wedding gown with you to your consultation/application! Having a visual of the dress gives the artist an idea of the style of the dress and the wedding. Is it dramatic? Romantic? Elegant? This will also give the artist a glimpse of your style as a whole.
Remember, makeup goes on and comes off easily, so don’t be afraid to say something if you don’t like what the artist has done. It should be fun, and be a time to play with new colors and ideas to find your perfect wedding look! Once you have a look set that you like, have the artist write down everything that he/she used and makes note of items that you may not have that you’ll need that day.
If you’re doing it yourself:

1. Use a moisturizer with an SPF of at least 30, especially if your wedding is outdoors. Chances are, you’re probably getting more sun than you think you are, and you don’t want to look too pink in your wedding pictures.
2. Make sure that your foundation matches perfectly. It should be gone after you blend it along your jaw line in 2-3 strokes. If not, you’ll be blending the wrong shade forever.
3. Two words: Waterproof Mascara. Even if you don’t like to wear waterproof mascara every day, you can apply a layer of your regular mascara followed by a light coat of waterproof mascara. That way if there are any (happy) tears on the big day, you won’t have any watery black streaks!
4. If you have a sudden breakout or blemish just before your wedding day, don’t panic, and don’t touch it. It may be tempting, but squeezing and touching will make it worse, whereas if you leave it alone, it will heal more neatly. If a sudden monstrous blemish appears that you just cannot deal with, see your dermatologist and ask if they can give you a cortisone injection which will shrink it right away.
5. If your eyes look red or tired, pop an eye drop to ease some of the irritation. Stick with a brand that you know and trust though, to avoid any unwelcome surprises!
6. To keep your powder and concealer on all day, fold a tissue into squares and lightly press foundation before you’ve powdered to remove excess oils and leave only pure pigment. Then, apply a little more powder than you’d think you need, and press again with a tissue. The foundation will stay on hours longer this way.
7. Don’t forget your blush! If you have fairer skin, try using a pinker shade, for darker skin tones a rosier hue will work.
8. Go brighter with your lip color. Pale nude or brown lip colors can make you look a little washed out in photos, especially since you’ll be wearing white. If you normally wear a natural lip color, wear it as your base with pink on top. If you normally wear a darker color, use that as your base with a sheer pink on top for a lift.
9. When applying makeup to the eyes, it’s usually best to go with neutral colors, and play up colors with cheeks and lips. Make the most dramatic part of your eyes be your lashes and eyeliner (this will look best in pictures). Do this by applying black or brown eyeliner to the outer ½ or ¼ part of the eye and blend with a q-tip. Then, take your mascara and eyeliner brush and lightly line the eye with your mascara. Let dry and smudge again. It will stay on for hours! Don’t forget to curl your lashes before applying mascara, not after!
10. When you’re finished with your look, you may want to apply a little more blush, then a light layer of loose powder, then lightly mist with a soft spray of water to set. It will take away the look of makeup while helping to set the makeup.