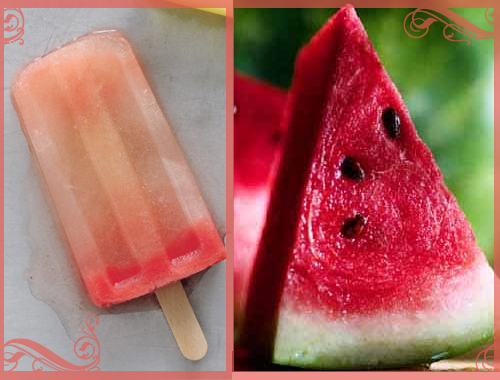
Watermelon Margarita Pops

watermelon

I thought these were very fitting for the 4th of July. Watermelon is a staple at almost every 4th of July cook out. So, adding a little margarita and making it into a popsicle makes it even better. This is a great adult treat to cool the taste buds. Enjoy! Want just regular margarita popsicles? Click here!


Ingredients:

* 5 cups chopped seedless watermelon (1 1/4 pounds)
* 2 tablespoons fresh lime juice
* 3 tablespoons superfine granulated sugar
* 1/4 cup water
* 1/4 cup silver tequila


* Equipment: 8 (1/3-cup) ice pop molds and 8 wooden sticks


Directions:
Purée all ingredients in a blender until smooth, then strain through a fine-mesh sieve into a large measuring cup, pressing on and then discarding solids. Skim off any foam, then pour into molds. Freeze 30 minutes. Insert sticks, then freeze until firm, about 24 hours.
Source


Twitter


DIY: Monogrammed Lanterns

lanterns

By now, I am sure you all now that I am absolutely obsessed with candles and lanterns. I love, love, love them! They give off such a gorgeous glow and really set the mood for a wedding. That said, every time I find a beautiful lighting idea I just have to share. This idea is surprise, surprise, a lantern idea! This beautiful design is created by A Field Journal and can be found on Project Wedding. So, check out Project Wedding for more pictures!


Materials:
a. Battery operated tea light, do not use conventional tea lights (app. $1 each)
b. 2 brads ($3.00 for 100)
c. Ribbon, several inches in length
d. Strip of vellum 2.5″ by 5.25″; trim one of the long sides with decorative scissors if desired ($10.00 for 50 sheets – each sheet will easily make 5 lanterns)
e. Double stick tape


Supplies for optional embellishments:
f. Needle and thread
g. Paper flowers
h. Pin
i. Printed letter

lantern

Directions:
1. Wrap strip of vellum around battery operated tea light, adhering with double stick tape.
2. Using brads attach length of ribbon to “lantern” to form a handle from which to hang.
Optional Embellishments:
Pinhole Monogram: Before assembling lantern, use a pin and a printed letter as a guide to punch a monogram in the vellum strip.
Flowered handle: After the lantern is assembled use a needle and thread to tack paper flowers to ribbon handle.
All instructions and pictures courtesy of Project Wedding.


Twitter


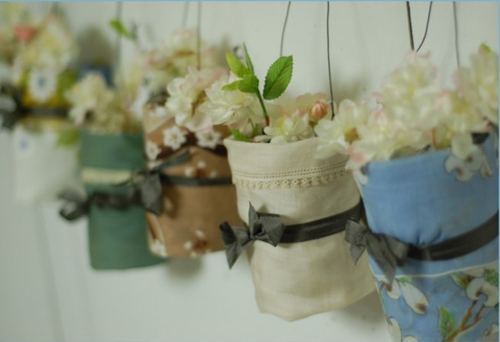
DIY Hanging Handkerchief Vases

jar

I found this beautiful DIY wedding idea on Once Wed. This is a design that was created by Laurie over at Etsy and I have to say that it is perfect!This DIY project has everything I love. It is easy, beautiful, and not outrageously expensive. Enjoy!

Materials:
Several Canning Jars (1/2 pint wide mouth with the straight sides)
Several Handkerchiefs (in coordinating colors)
Ribbon
Bailing Wire
Rubber Bands
Flowers
Wire Cutters
Scissors
Iron and Ironing Board
Resources: Canning jars are easy to find at yard sales and thrift stores, so are handkerchiefs. Bailing wire is available at any hardware store.

jar2

Directions:
1. Press all of your handkerchiefs flat. (if you’re going to be use these in a humid location, I would suggest using a little spray starch to help keep them crisp)
2. Fold the bottom of your handkerchief up (see figure 1) and the top of the handkerchief down (see figure 2) to create a band of fabric that is the same height as the jar. Press the folds.
3. Cut a 2 1/2 foot length of bailing wire. Wrap it tightly around the grooves in the top of the jar, then create a hanger. (see figure 3)
4. Wrap the folded handkerchief around the vase and secure it with a rubber band. (see figure 4)
5. Cut a length of ribbon (about 18 inches or so) and tie it around the vase to conceal the rubber band. Tie the tails in a bow. (see figure 5)
6. Add a little water in the bottom of your vase, insert the flowers. ( see figure 6)
7. Create a grouping of coordinating vases and hang from a tree, and arbor, or from the ceiling.
What it Cost:
Handkerchiefs $.25 – $3.00 each
Ribbon $.25 a yard
Bailing wire $3 for a 50 foot spool


Jars, if purchased new are about $9 for one dozen (but they are easily found for much less when used)


Twitter


Simple Summer Hair

My favorite hairstyles for summer weddings are ones that are simple and elegant. I love a style that just lets the beauty of the bride show through. Plus, in the summer I love to see flowing styles. I am also a sucker for ponytails (as you can tell from the pictures below!). When a ponytail is done right, it is my favorite hairstyle out there!!

hair

picture source


Twitter


4th of July Dessert Ideas

When it comes to holidays, I automatically think dessert! Holidays are the only days of the year that I can justify eating ANYTHING that I want. Holiday equals total cheat day in my book! That is why I was looking at these super yummy dessert options for the 4th of July. Not only are these great for any patriotic party, they would also be super scrumptious at a bridal luncheon.  Just click on the links below to go to the recipes!

patriotic

Berry Bliss Cake,Strawberry Shortcake,Patriotic Pie,Patriotic Pizza


Twitter


Flowers from Bloomtastic

bloomtastic

If you are looking for a wonderful florist, I have to say that  Bloomtastic is the best! I may be a bit partial since they did my wedding, but I think they are great. They entire staff is very knowledgeable and are willing to give you great ideas that fits with your theme and budget. Here are some pictures from a recent wedding from Bloomtastic. The bride’s bouquet was designed of roses, carnations and cymbidium orchids. Bridesmaid’s bouquets were designed of dahlias, roses and cataylea orchids. The centerpiece was hydrangeas and oriental lilies. Breathtaking!


bloomtastic2


Twitter


Peach and Chamomille Mousse Cakes

peach small

I am a sucker for desserts! I LOVE them! That is probably why I am always looking for fun dessert options for weddings. Wedding cake is a given, but…..dessert bars are becoming super popular. Tartelette is always a great site to check out to get super stylish and yummy dessert options. These Peach and Chamomille Mousse Cakes are gorgeous and look soooo yummy! The inspiration was fresh peaches from the farmer’s market. To get the recipe click here!


peach


Twitter


DIY Tin Can Table Numbers

tin cans

Here is a super cute and cost effective idea for table numbers. These tin can table numbers are courtesy of the 100 Layer Cake blog and they are too cute for words! I love how they are inexpensive and eco-freindly.


Materials:


drill (with an appropriately sized bit)
gold spray paint
tape
candles
a ruler
letter size colored paper
spray mount
exacto knife
cutting mat
and your number stencils, which you can download here.


tin can2

Instructions:

Step 1: Tape off the inside of your cans so no spray paint gets inside. Spray the outside of each can with the gold spray paint (or any color you like). Be sure you don’t hold the spray can nozzle too close to the tin can, which can make for drippy, runny lines down your pretty table numbers and no one wants that.


You may need to do two or three coats depending on how opaque you want to the color to be.


Step 2: Once your cans are dry, wrap your printed number stencil around each tin can.


Step 3: Drill. Yay! Start by drilling the outline of the number first (following the stencil line), and then work your way in. It certainly doesn’t have to be perfect, but the more holes you can drill, the more light your can will give off.


Step 4: Slide your colored paper into the can on the opposite side as the number. Mark the paper with the appropriate height and width (you don’t want it to cover your numbers. Next trim the paper to the correct size using your cutting mat and exacto.


Step 5: Spray mount the trimmed paper to the inside of your can (opposite the number). And you’re done! We used red paper but you can of course use whatever color you like. If you’re using a color you’re not sure about, consider doing a test can first and lighting it that night to make sure you like the look before you finish the rest of your numbers.


Click here for more pics and source.


Twitter